Easy, Cheap, and Reliable Auto Z Height Setting
 Disclaimer:
This write-up is about what I am using personally with my equipment for Auto Z height setting. It may not work with other equipment or suit anyone else’s needs. I make no guarantees, warranties, claims, nor promises.
A lot of the information covered here is also covered by the CNCRouterParts touchplate tutorial (that I wish had been there when I made my gauge!). You may find that informative and may even wish to purchase that product instead of attempting a kludgery such as I have done.
That being said, this is cheap, easy, and reliable. It serves my purposes well. Even if you’re not using the same equipment or software this is something that can be adapted to many home CNC set-ups and some will hopefully find useful. Auto Z setting really is a game changer. If you aren’t using it I would strongly recommend getting it set-up in one form or another.
The Hardware Side:
The relevant equipment I’m using:
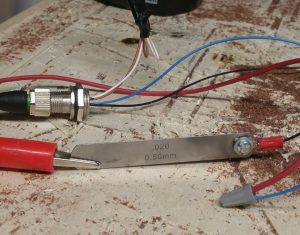
The components I used:
- Automation Direct 4 pin M12 cable
- Automation Direct 4 pin M12 bulkhead connector
- Harbor Freight feeler gauge
- Large alligator clip
The total cost of the listed components at the time of this writing and not including shipping is about $22. The connectors on the CNCRouterParts electronics are industry standard 4-pin M12 so any that you prefer can be used. You don’t even really need the bulkhead connector. You can cut the end off the cable and strip back a foot or so of jacket to expose the wires. I just wanted to be able to make a nice enclosure… some day.
A few notes about component selection:
- Get a long enough cable to reach anywhere on your CNC machine
- Get a big enough alligator clip to grab somewhere on your spindle that is grounded to the frame
- Use a feeler gauge that will flex a little but without the possibility of kinking
I used the CNCRouterParts electronics Aux 1 port pins 3 (blu) and 4 (blk). I connected the clip to one of those wires from the bulkhead and the feeler to the other. For the feeler I used a #6 machine screw and nut through the existing hole tightened onto a fork terminal. Once this is done connect the connectors together and configure the software.
 The Software Side:
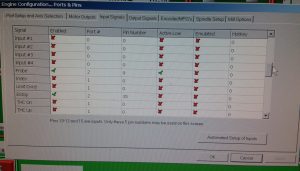
The first thing that needs to be done in Mach3 is configure the probe input. Under the Config menu select Ports & Pins. Click the Input Signals tab and scroll down until you see the settings for Probe. In my case it should be set to enabled, port2, pin 9, active low.
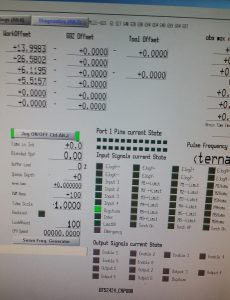 Before going any further the connections and settings need to be tested. This can be done from the Mach3 Diagnostics tab. With the clip and feeler held apart the Digitize indicator should be dark. It should light up whenever the two are touched together. If this isn’t the case then something has gone wrong and needs fixed before going any further.
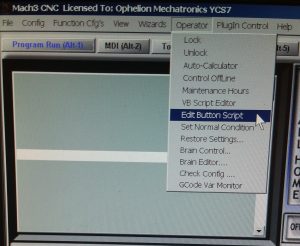
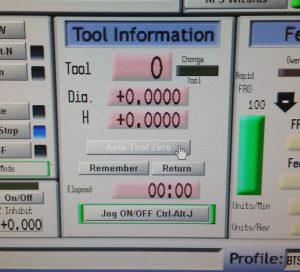
Now the Auto Z script that comes with Mach3 needs edited. Find the Operator menu and select Edit Button Script. Any buttons that have scripts associated with them will begin blinking. We want Auto Tool Zero in the Tool Information section. The default script in my case was named HiddenScript.m1s. All that needs to change is the variable TouchPlateHeight be set to the thickness of feeler gauge used. In my case 0.020 inch.
An error has occurred. Please try again later. |
Usage
The first time you run the Auto Z script is positively nerve wracking. To test it run your Z up high and hold the clip and the gauge close to each other near the e-stop. Push the Auto Tool Zero button to start the script. As soon as the Z axis starts to move touch the clip and the gauge together. If all motion doesn’t stop immediately hit the e-stop. If it did stop then you should be all set to try it for real.
Feel free to contact me with any questions and if you build one be sure to tag _ophelion on instagram!

One Thought to “Easy, Cheap, and Reliable Auto Z Height Setting”